
A multi-chip module is not built by placing parts. It is built by deciding what happens to which surface, in what order, across a build that touches the substrate dozens of times. On a prototype MCM, most yield loss is decided before any tooling starts — in the sequence.
When MCM prototypes fail in qualification, the instinct is to look at the bond, the attach, or the seal in isolation. In our experience, the individual operations are rarely the problem. The problem is a sequencing choice made on day one that quietly constrained every operation that followed.
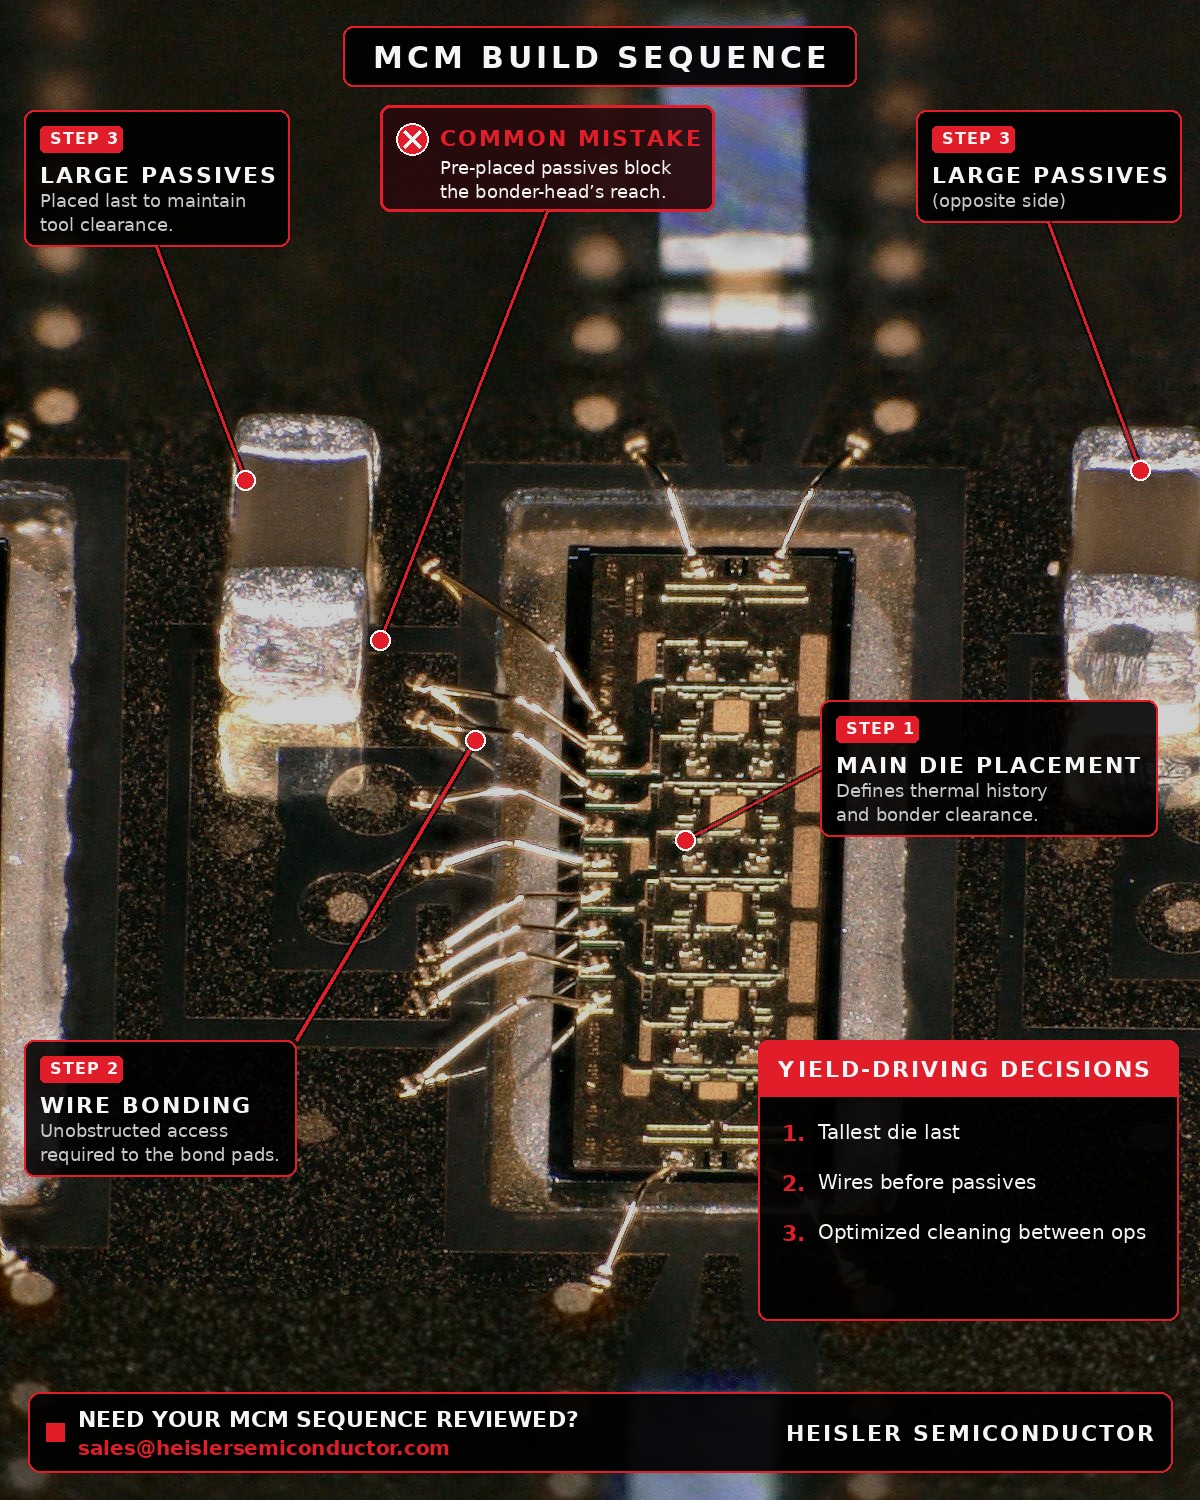
The decisions that drive yield
The order of operations on an MCM is a design problem, not a default workflow. A handful of choices set the ceiling on what the rest of the build can achieve:
- Die placement order. Tallest die last, so the bonder keeps clearance over parts already placed. Heat-sensitive die later in the thermal history, so they see fewer cycles.
- Wire bond before passives. Capacitors and inductors go down last, so they never block the bonder’s access to the bond pads. Place them early and you have designed yourself into a corner.
- Cleaning between operations. Define what gets cleaned, with what, and when — deliberately, as part of the flow. Cleaning is not a default step you sprinkle in; the wrong solvent at the wrong moment carries contamination forward.
- Hermetic seal timing. Gas atmosphere and lid attach planned around what has been exposed, and for how long. Seal too early and you trap a problem; seal too late and you have already absorbed moisture.
- Test points scheduled into the build. Designed in from the start, not bolted on at the end when there is no longer room or access for them.
The difference a good sequence makes
When the sequence is right, the first article runs through to test and units two through ten are repeats — not rediscoveries. The build becomes a process you can hand to someone else and trust. When the sequence is wrong, every build is its own debugging session, and the yield never stabilizes because you are fighting a new problem each time.
This is the quiet multiplier on prototype programs. Two shops can own the same bonder, the same die attach system, and the same sealing equipment, and get very different yields — because one designed the order of operations around the specific package geometry and material stack, and the other inherited a generic flow.
The mistake we see most often
The most common failure on prototype MCMs is treating the sequence as a default workflow — the one from the bonder vendor’s demo, or the one that worked on a different package — rather than designing it around this package. The demo flow is built to show the machine working, not to maximize yield on your geometry. Borrowing it is how a clean set of operations still produces a build that will not repeat.
The fix is cheap if it happens early and expensive if it happens late: review the order of operations against the package geometry and material stack before tooling begins, while changing the plan still costs a conversation instead of a rebuild.
If your team is starting an MCM prototype and wants the sequence reviewed before tooling is committed, that review is exactly the kind of work we do.